Mushroom chocolates are really popular these days, and lots of people are into them because they might spark creativity or give you a cool new feeling. If you want to make your own at home, you’re in the right spot. It’s not hard at all to make these chocolate bars, it’s pretty simple and fun.
This guide from Shroom Homies shows you How to Make Mushroom Chocolate Bars at Home. We’ll show you how to melt, grind, mix, and mold everything. We’re not telling you what to do or giving medical tips. We just want to help you make your own chocolates, choosing your own flavors, textures, and shapes. Knowing how to do this means you control what goes into your edibles, which is super important to us and what we tell our customers about in Our Story.
What You’ll Need
Before you start your mushroom chocolate project, get everything ready. Keep it simple—you don’t need fancy chef equipment.
Main Stuff
-
Chocolate: Good quality dark, milk, or white chocolate chips or bars all work. Pick one you actually like to eat.
-
Dried Mushrooms: Make sure these are super dry (cracker dry). If they’re not, they’ll mess up the chocolate texture.
-
Optional Flavor Fun: Orange or lime peel, spices like cinnamon or chili, sea salt, espresso powder, or chopped nuts.
Tools You’ll Need
-
Grinder: A coffee or spice grinder to turn dried mushrooms into powder
-
Melting Pot: A double boiler or microwave-safe bowl
-
Kitchen Scale: For accurate measuring
-
Silicone Spatula: For mixing and scraping
-
Silicone Bar Molds: For shaping and easy removal
-
Tight Containers: To keep finished bars fresh
Step 1: Get Your Mushrooms Ready When Making Mushroom Chocolate Bars at Home
To make a smooth, well-mixed mushroom chocolate bar, preparing your mushrooms properly is key. The fineness of the powder really changes the final result.
Make sure your mushrooms are completely dry. Any moisture will cause clumps and ruin the texture. Break them into smaller pieces and add them to your grinder.
Pulse until you get a fine, even powder. For extra smooth chocolate, push the powder through a fine-mesh screen to remove larger bits. Finer powder blends better into melted chocolate. You can find more helpful tips in our Blog.
Step 2: Melting Your Chocolate Just Right
The secret to shiny chocolate that snaps when broken is tempering. It sounds fancy, but it’s just heating and cooling chocolate to specific temperatures so the cocoa butter stays stable. You can skip this step, but your bars may be softer or melt more easily.
How to Melt Chocolate
-
Double Boiler: Place a heat-safe bowl over a pot with about an inch of simmering water. Add chocolate and stir gently until smooth.
-
Microwave: Heat chocolate in a microwave-safe bowl for 20 seconds at a time, stirring between each round.
A simple home tempering method is to melt about two-thirds of your chocolate, remove it from heat, then stir in the remaining third until fully melted. It’s not professional-level tempering, but it improves texture a lot.
Related Article: Making Sense of Shroom Chocolate: A Focus on Quality
Step 3: Mix, Customize, and Create
Once the chocolate is fully melted and smooth, it’s time to mix. Work fairly quickly before the chocolate starts to harden.
Stir your finely ground mushroom powder into the chocolate using a spatula. Mix thoroughly so it’s evenly distributed.
Now comes the fun part—customizing your bars.
Fun Flavor Mixes
-
Citrus & Salty: Orange peel with a pinch of flaky sea salt
-
Spicy & Warm: Cinnamon with a hint of chili powder
-
Coffee Shop Style: One teaspoon of espresso powder for a mocha flavor
-
Crunchy Bits: Toasted nuts, puffed rice, or crushed cookies
Mix everything until evenly combined. If you want to explore different preparation styles, our article Chocolate vs. Raw: What’s the Difference goes deeper.
Related Article: The Legality of Mushroom Chocolate Bars in 2026
Step 4: Mold and Let Them Set
Place your silicone bar molds on a flat surface, like a baking sheet, so they’re easy to move.
Carefully pour or spoon the chocolate mixture into each mold. Fill to your preferred thickness, then gently tap the molds on the counter to release air bubbles.
Let the bars set in a cool, dry place. Avoid the fridge if possible, as moisture can form on the chocolate. Depending on temperature and humidity, setting usually takes a few hours. They’re ready when fully hardened and easy to pop out.
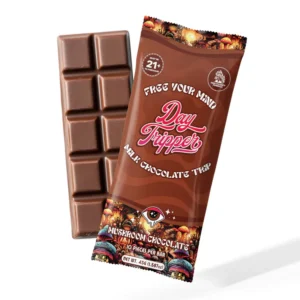
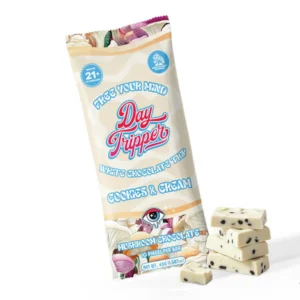
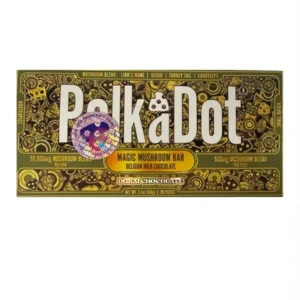
If you’d rather skip the DIY process, you can always try one of our ready-made options like the Tre House Chocolate Crunch Mushroom Bar.
Related Article: Mushroom Chocolates for Stress Free Holidays
Step 5: How to Keep Them Fresh
Proper storage keeps your mushroom chocolate tasting great and looking good. Heat, light, and moisture are chocolate’s worst enemies.
Store finished bars in an airtight container in a cool, dark, dry place like a pantry. Label containers with the flavor and date made so you always know what you have.
Quality and transparency matter to us—that’s why we openly share details about Our Manufacturer and provide full Lab Test Results for everything we sell.
Be Smart and Safe
When trying homemade edibles, mindfulness matters. Effects can vary from person to person and batch to batch. Many people recommend starting with a very small amount, especially with a new recipe, and waiting long enough to feel the effects before having more.
It’s also important to understand and follow all local laws. You can learn more by visiting our Legal Information and FAQ pages.
Related Article: Mushroom Chocolate Pairings: A Flavor Guide
Your Chance to Create Is Here
You now have a flexible, easy-to-follow plan for making mushroom chocolate bars at home. This gives you the freedom to experiment with chocolates, flavors, and textures that suit your taste.
Whether you’re making a simple dark chocolate bar or something spicy and crunchy, the most important part is enjoying the process. And when you’d rather leave it to the experts, explore our carefully selected collection in the shop.
Common Questions
What chocolate works best for this?
High-quality dark, milk, or white chocolate all work well. Choose chocolate you enjoy eating on its own. Chocolate with higher cocoa butter content usually melts smoother.
How long do mushroom chocolate bars take to harden?
Typically 2–4 hours at cool room temperature, depending on humidity and warmth. Bars are ready when firm and easy to remove from molds.
Why is tempering chocolate important?
Tempering stabilizes cocoa butter crystals, helping chocolate look shiny, snap cleanly, and resist melting. It’s optional but improves results.
Can I add other ingredients to my mushroom chocolate bars?
Absolutely. Nuts, dried fruit, puffed rice, spices, and flavor extracts work well. Just avoid water-based liquids, which can cause chocolate to seize.